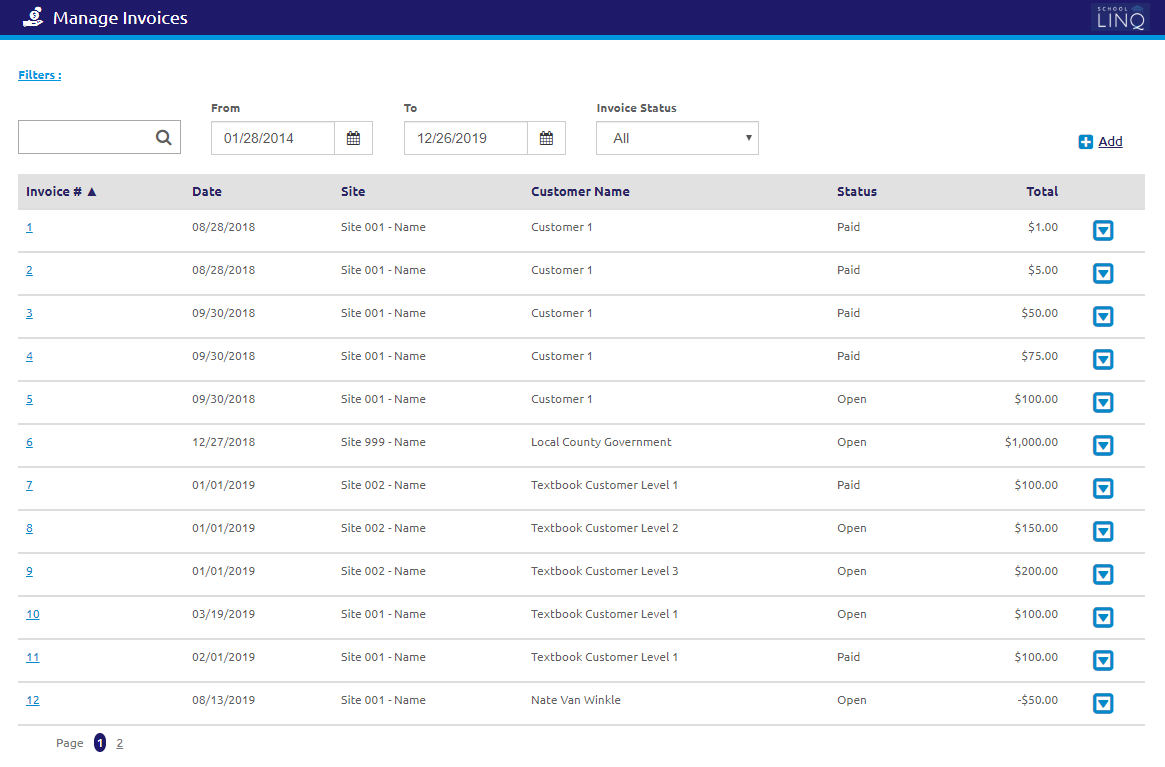
Manage Invoices in Accounts Receivable
Manage Invoices allows users to create and edit invoices.
Add / Edit Filters
- Click the
 link. The Add / Edit Filters form will display.
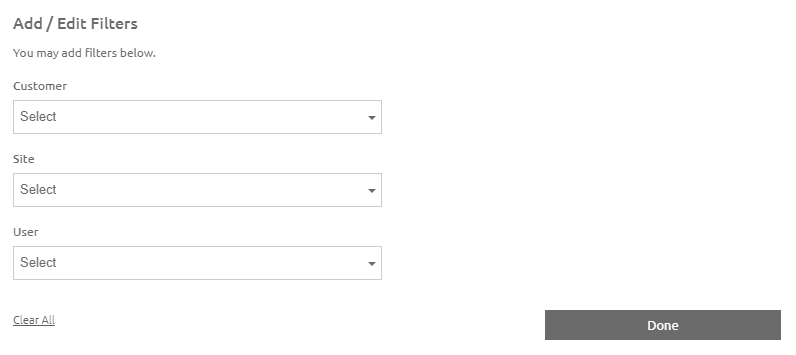
- Select a customer from the Customer drop-down list.
- Select a site from the Site drop-down list.
- Select a user from the User drop-down list. The grid will refresh on the next form.
- Click the
.png) button.
button.
Search Invoices
- Enter an Invoice #, Site, or Customer Name in the
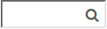 field.
 - Enter or select a date range using the Calendar feature in the From and To fields.
- Select a status from the Invoice Status drop-down list.
- Click the
 icon to view quick details about the invoice.
 - Click the
 button to view or edit the selected invoice. The View / Edit Invoice form will display.
- Click the
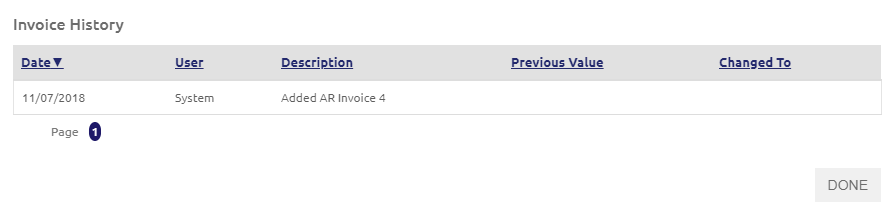
 button in the upper right-hand corner to view an audit history of the invoice. The Invoice History window will display.
- Click the
Create New Invoice
- Click the
.png) link. The Create New Invoice form will display.
link. The Create New Invoice form will display.
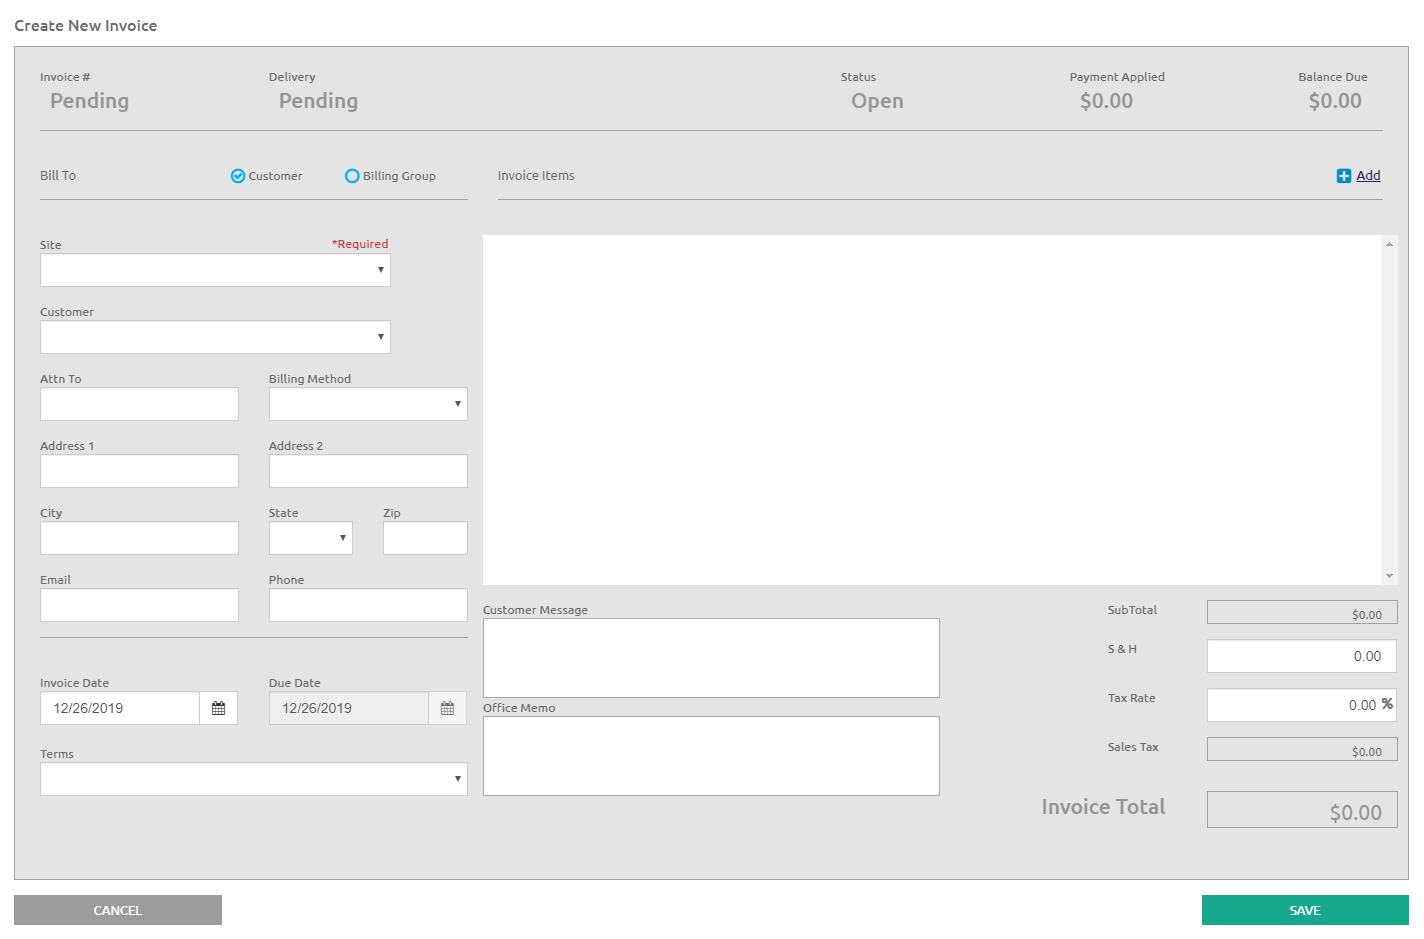
- Select either Customer Invoice or Billing Group invoice.
Customer Info
- Select the site from the Site drop-down list.
- Select the customer from the Customer Name drop-down list. The customers listed in the drop-down list were created in the Customers section under Cash Management.
- Enter contact information in the Attn To field.
- Select Print or E-Mail from the Billing Method drop-down list.
- Enter the customer Address, City, State, Zip, Phone, and Email in the respective fields.
Billing Group Info
- Select a site from the Site drop-down list.
- Select a billing group from the Billing Groupdrop-down list.
- Information about the billing group displays in the grid.
- Double-click a customer name to preview their information.
- Users will need to go to Customers if any customer information needs to be changed.
- Once the form is completed, an invoice will be generated for each customer in the billing group all being identical except for the invoice number.
Invoice Info
- Enter or select the Invoice Date using the Calendar feature.
- Enter or select the Due Date using the Calendar feature.
- Select the term from the Terms drop-down list.
Invoice Items
-
Click the
link to add a new Invoice Item. - Enter the item code in the Item Code field.
- Enter the quantity in the Quantity field.
- Enter a description for this item in the Description field.
- Enter the price in the Price field.
- Check the Taxable? box if the item is taxable.
- The Total field will be calculated automatically.
- Click the
 icon to delete any line.
NOTE: Click the link to add an additional to the invoice.
Comments and Amount Totals
- Enter a message to the customer in the Customer Message text box, which will display on the invoice.
- Enter a memo in the Office Memo text box.
-
Enter Shipping & Handling and the Tax Rate, if applicable.
- Click the
 button. An invoice number will be assigned.
©2021 | EMS LINQ, Inc.
School LINQ Help, updated 01/2021